It's Absolutely Hairy! How Tos and Resources for Art Doll Hair
With references to available free resources online
Every time I start a project, I find myself looking for new methods to try or improve what I'm already doing. It's a constant state of learning. Right?
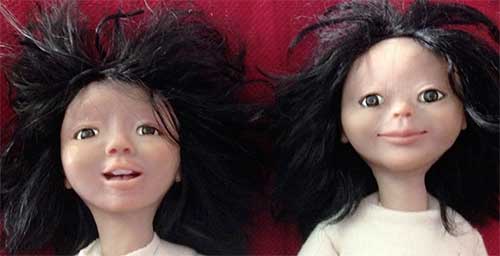
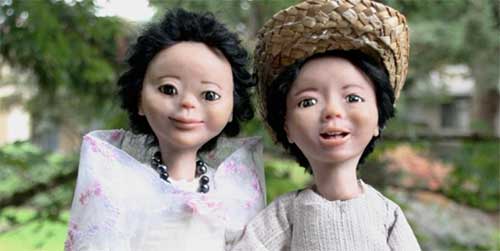
When I was working on the first Asian twin dolls (after my nephew's and niece's likeness) I needed really straight and shiny black hair. I've had difficulty making natural fibre super straight, when I first attached the hair, they were all curly and wavy and as you can see in the photo above, it looked like rockstar madness instead of the tame, straight hair I needed. I ended up cutting the little boy's hair short and putting the girl's in a bun (below).
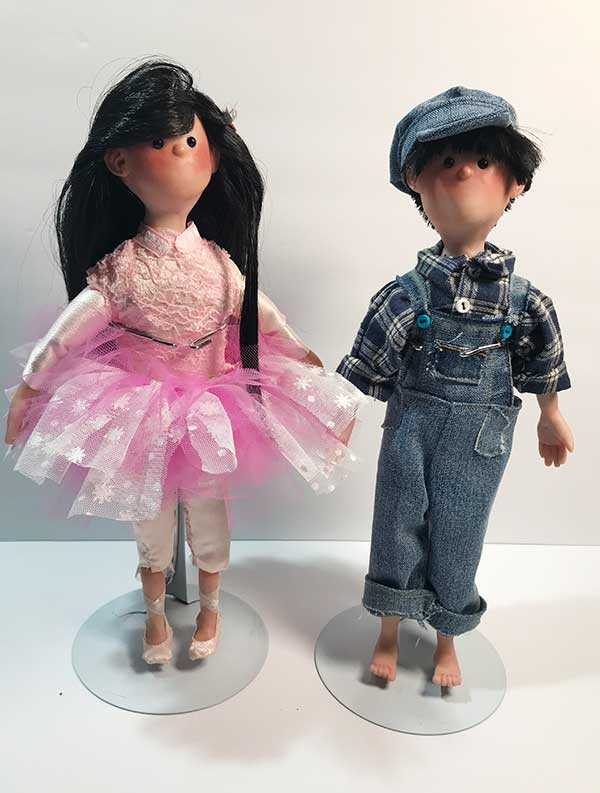
A few years later, I made another pair, this time it was in totally different style, but still after the likeness of the same twins. It was going to be a gift for their mom to display in their home. Their clothes reflected their current loves at the time: the girl's was ballet and the boy's trains.
That time though, I wanted straight black hair. And that got me into researching again, what options are out there and what artists are doing to attach hair or make hair (wigs).
That thought led to this post... a collection of videos and/or tutorials I've found helpful and very informative.
What hair?
First, let's look at what materials are out there. Sugar Charm Shop (I love her work and often find myself stopping on my IG feed to watch how she makes things in those short vids she posts) has a great compilation of materials available out there.
Sugar Charm Shop on the different materials that can be used for hair/fur
I prefer to use natural fiber but I like I mentioned earlier, I wanted really straight hair so I decided to try synthetic. I was very pleased when it arrived, it was really straight and shiny! But it had a little stubborness to it, a slight "plasticky" feel, even though it was soft - does that make sense? I was not sure how it will be when I glued it on and if I can even style it.
I ordered four sets, two to use and two as spare in case I mess up. Even before it got delivered I was researching how to use it.
Sewing a Wig
I found Dollightful's Sewn Wig Tutorial on Youtube and her material looks like the synthetic hair I bought. This is definitely a process I would like to try (I later decided to glue mine directly on to the doll head):
Dollightful on sewing hair wefts
Rooting
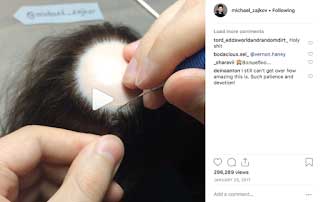
The first time I saw this method of inserting hair one piece at a time on the head was in an IG post by Michael Zajkov. It's like rooting reborn babies (there are lots of other samples out there, just linking this video for easy reference). Michael Zajkov inserted each strand in a circular pattern and it looked so natural. Crazy good, and crazy patience! No wonder his dolls look so gorgeous!
Michael Zajkov rooting a doll head
Custom Doll Baby - micro-rooting reborn dolls
I tried rooting on a test head but boy oh boy, it's a painstaking process! I need a ton of practice before I can really do it successfully and I think I need different tools!
I also found a reference of this method in Glass Attic. In the art doll section, scroll down to "hair" (the site has a lot of tips on different materials and methods, also in using polymer clay to make hair), it has tips on what needles to use if you're trying the rooting method.
Glass Attic is a great reference for so many things but a lot of the links were not working anymore.
Needle Felting a Wig
Fairys N My Pond shows a different way to make a wig cap using latex (mold builder) instead of the usual cloth (or stocking) with white glue. Below that is another video where she shows how to needle felt hair into the wig cap.
Fairysnmypond using latex for a wig cap and needle felting hair in it
Glue On
My preferred method of applying hair is gluing the material directly to the scalp. First, you prepare small batches of hair and glue the ends (the end that goes in the scalp) together in what is called a weft. Once you have enough wefts to fill the head (and make the hair as full as you want), identify the hairline and start gluing each weft on the head, making sure to cover the hairline marks while going around the head in a circular pattern, working your way inwards.
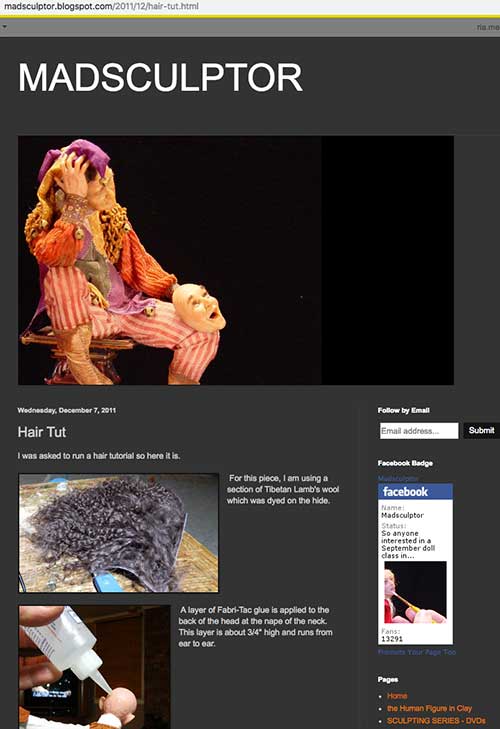
If I remember correctly, I first saw this method from the MadSculptor aka Mark Dennis. When I first started looking into polymer clay, I saw his work and was simply amazed, his dolls were so full of life, as if they're always ready to spring to life! He sparked my interest in art dolls.
The Madsculptor glues the cut strands directly to the head. He has a step-by-step photos in his blog (which I hope he never takes down):
The Madsculptor talking about hair application on his blog
For video demonstration of the same process, here's one from Celidonia Studio. Hair work starts around timestamp 3:33 and she shows how to cut the strands, apply glue on the head and go around in a circle till she has a full set of hair! By the way, I love that fairy green hair.
Celidonia Studio shows how to apply hair and hair accessories
April Jensen starts off her hair slightly differently; she puts a couple of wefts/plugs (Tibetan lamb) up front first to frame the face. I have yet to try this and I definitely will because it frames the face so nicely!
Aprilian shows how to apply hair
Yarn Wig
HeXtian shows us how use yarn and make it look like mohair, Alpaca or Tibetan lamb. He brushes yarn with a pet brush and work it till it's soft and thin. He then makes wefts and glues the wefts on to the wig cap. He also shows how to style it. HeXtian is like a real-life hair stylist at work. I learned a lot just watching – like using an eyebrow razor to trim hair!
While in a workshop with Wendy and Toby Froud, I used a full piece of mohair with hide on the art doll I made. In the vision quest, I saw him as a bald man, but I couldn't resist adding hair because we were presented with a huge pile of fabric and fur to choose from. I finally gave My Old Man, a monkish hairstyle (a small compromise from being bald), starting almost by the ear and going round, leaving the top exposed. I did not have to remove the hide for that one, the fur was long and the hide was totally hidden. However, I find that it does not usually work with all projects, so I have to experiment and see which fits the bill.
This post and most of what I've learned would not have been possible without all the generous artists who share their own methods – you're absolutely fantastic!
Thank you Awesome Artists!
I hope you found this post helpful. If you know of a free tutorial or resource for sculpting art dolls, let me know so I can add it to this collection or future posts.
And before I end this post, here's the second set of twins I made that started this post: